Having a good and reliable environment to perform our malware analysis research is crucial. Obviously, we do not want to test malicious samples on our machine so we need to create a safe virtual machine we can go nuts and eventually revert to a clean machine at any given time.
As mentioned, I am not looking to use any special tools that will cost us tones of money so i am using two very important tools – VirtualBox and FLARE VM by Mandiant. These two tools are a must have when it comes to our humble malware analysis environment.
On this post, i will go through setting up the our own environment. Let’s get going!
Requirements
- The first requirement is of course having a Windows 10/7 ISO file. We can get it easily on Microsoft’s downloading site – I wont go over downloading and creating ISO file with Microsoft’s Tool – You got this!
- VirtualBox – can be easily downloaded and installed from VirtualBox website
- FLARE VM – We should get it from the FLARE VM GitHub Repository
IMPORTANT NOW – This guide is for creating Windows malware analysis environment. Linux environments and Android environments guides will be added later.
VirtualBox Setup
After installing virtual box we should run VirtualBox, and see the following:
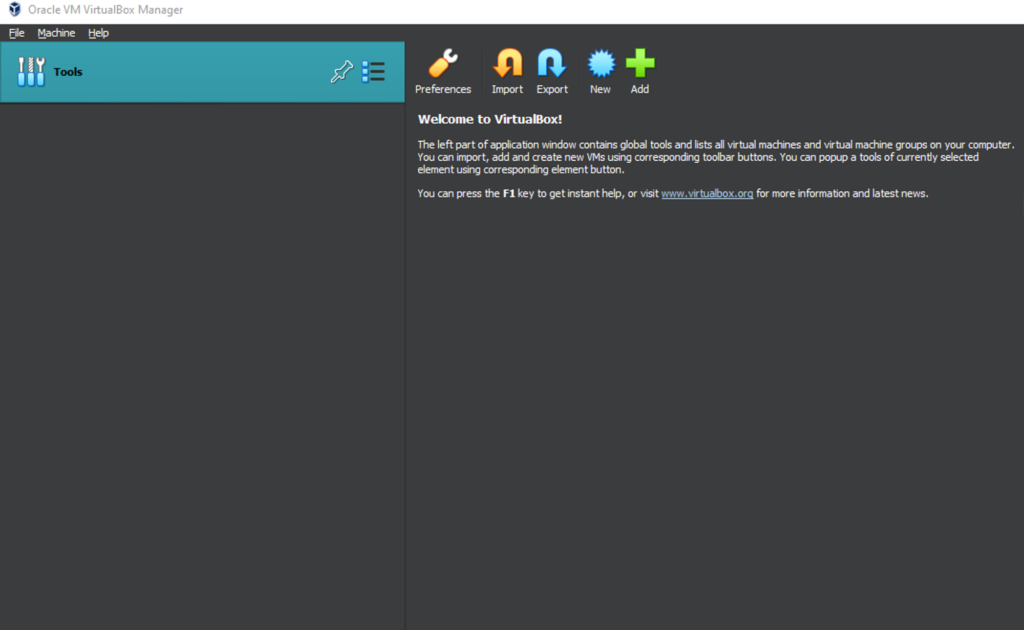
Now the first thing we should do is create a virtual machine that we will install the Windows10 and eventually the Flare VM on.
After clicking on the “New” (Blue Corona sign?? I don’t know..) on the top-right corner we will see basic form that we need to fill, including the machine name, ISO Image and more.

The name is irrelevant but it is recommended to have something indicative. I’m just calling it “Windows10” – nothing fancy.
On the ISO Image section we should select the Window10 ISO file we downloaded/created in advance. After doing so, the Type and Version fields will probably filled up automatically.
In addition, I also like to mark the “Skip Unattended Installation”.
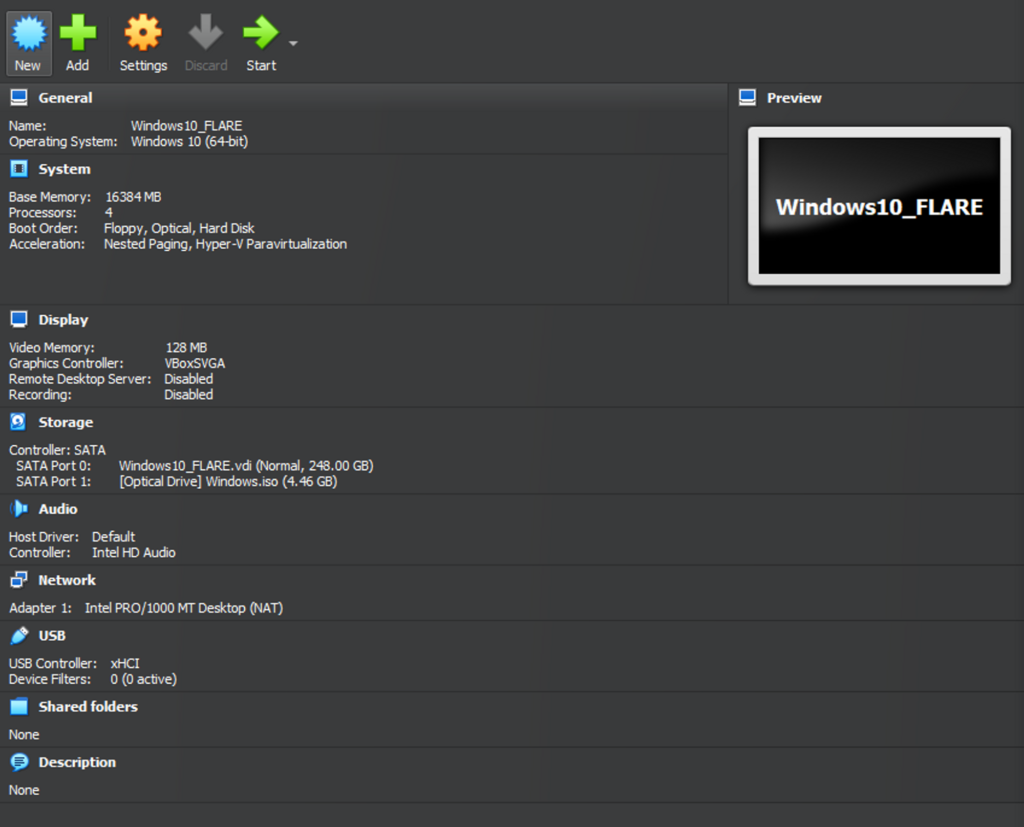
Now, we need to setup the hardware properties of the virtual machine we are working on. When installing Windows10 machine it is recommended, in my opinion, to choose at least 8GB RAM and at least 2 processors. it should look like so:

Finally we will configure the Hard Disk storage space we would like to have on the machine. Given the fact FLARE VM requires at least 70-80 GB of storage, we will go on the safe side with 248 GB if possible, but 128 GB might also do the trick.

Now, we should see something like the following:
The next steps should be more trivial. We would start the machine using the “Start” button at the top right green arrow and go with a normal Windows10 installation.
A tricky part is that we are installing a machine that will eventually be compromised by info stealers trojans, and sometimes ransomwares, we do not want to leave any marks that will lead to us. During Windows 10 installation thee is a part where you have to enter a valid email address, i recommend of course to create a dedicated email address to this machine. If you want to take extra steps to cover your tracks, you can sign in with a ProtonMail – highly recommended.
Setting Up Flare VM
Installing Flare VM is a long process and we need some patience with this one.
After installing Windows 10 the next step is installing Flare VM. The extended and official guide can be found in Flare’s GitHub repository if needed.
Disabling Automatic Updates
Before starting the installation we do need to take some steps to prepare the machine.
First we need to disable the Windows automatic updats.
To do so, we will go to Settings → Update & Security → Windows Update → “Pause updates for 7 days”.
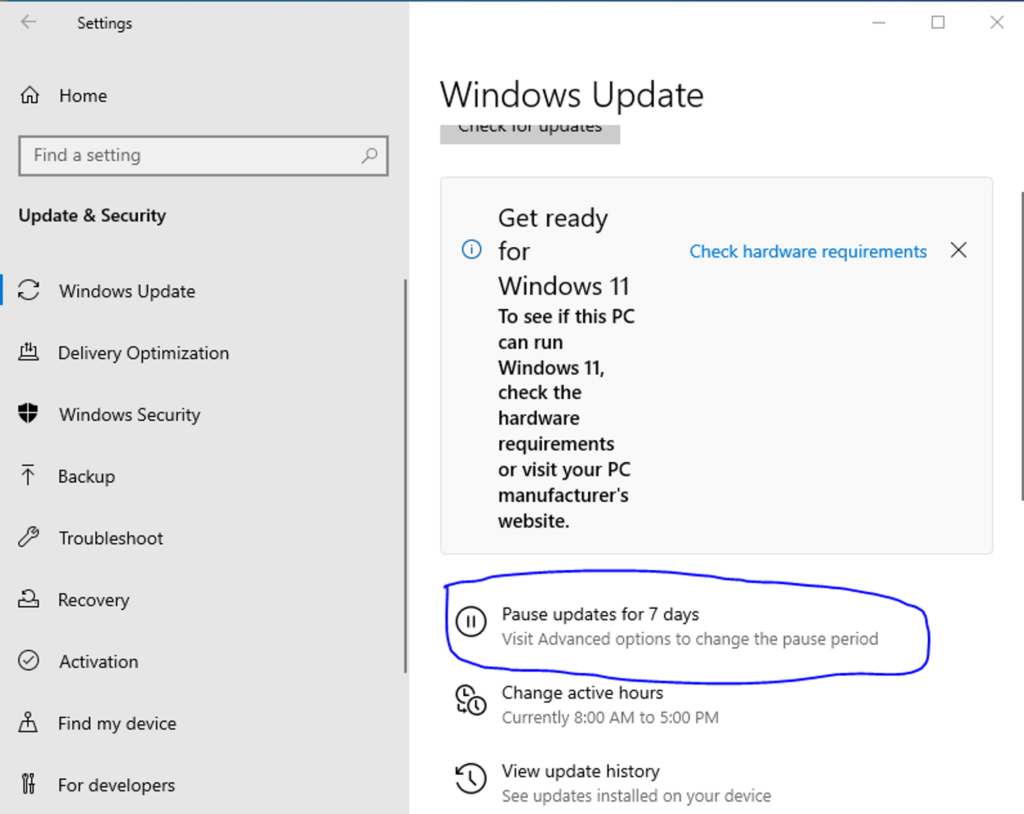
Given the fact that we will always revert the machine, we might not need to do this again.
If you are running Windows 10 machine Pro or Enterprise, you can completely disable it using this guide – It also shows how you can cancel the updated from both the registry and the gpedit.
Disabling Tamper Protection and Anti-Malware Solution
In addition to canceling the updates we need to also cancel Windows Defender functionality or else we will have problems examining, analyzing and executing malicious samples, believe it or not, Windows Defender does a pretty good job when it comes to commodities malwares.
Cancelling this modules involves taking several steps. The first is t cancel the Tamper protection.
In order to do so, we will go to Windows Security → Virus & threat protection → Manage settings → change the Tamper Protection to “off”.
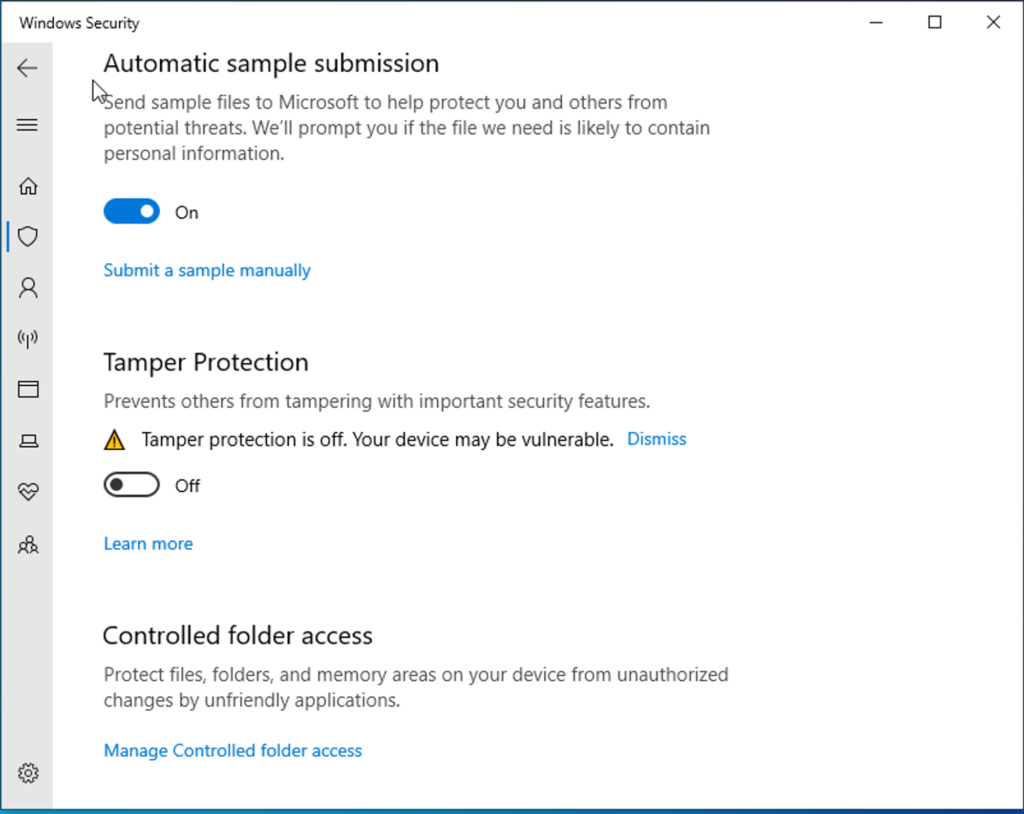
The next step is to cancel Windows Defender and Anti-Malware services. The process is pretty much the same:
Windows Security → Virus & threat protection → Manage settings → change the Real-time protection to “off”.
The thing here is that this type of cancellation will hold only until we restart the machine. So we will have to do that again each time we restart. One way to bypass that is to return to snapshots of the machine, but we will get to that later.
Installing Flare VM
The installation of Flare VM is long and demands the preparation i wrote about in earlier stages.
Once everything is set follow the installation steps in the official GitHub of FlareVM. it explains the steps shortly and keeps on updating.
Now the process of installation may take some time so prepare yourself.
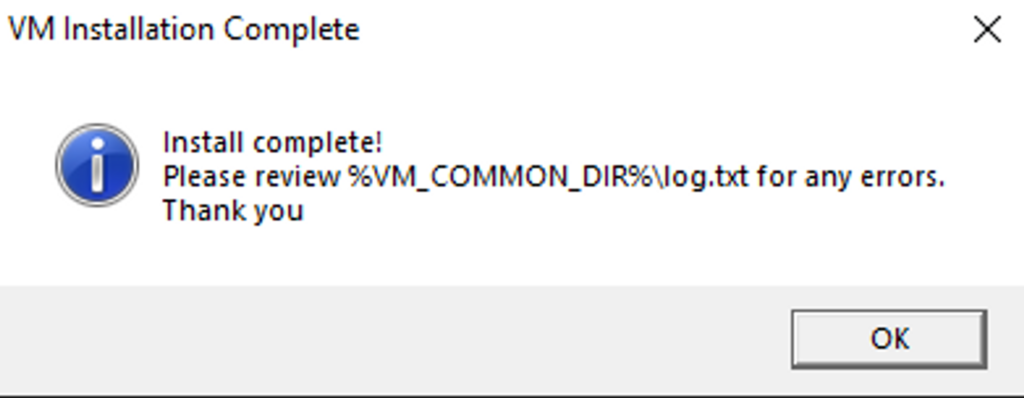
Once the installation is complete we will have our working space which we will do our malware analysis and other shenanigans!
At the end of the installation we should see the following message:
SnapShot
The post installation part is a short one. Basically we already have the machine up and running, although we dont want to install it again and again after each and every malware we run right?
Exactly for that we use one of VirtualBox dark magic named “Snapshot”. Now i’m not going to lie, this is not exclusive for VirtualBox in any matter, but it is being used a lot.
The idea is to take a snapshot of the current state of a machine which we will always return to it after we run some malicious stuff in our machine.
Ideally, we will take a snapshot before each time we analyze a malware, and will revert to the original, or ‘clean’, state after we finished.
Taking a snapshot is easy, all we need to do is selecting the machine we want to take snapshot of and press the “Take” button on the top center screen in our VirtualBox client (Figure 2).

Then, we are prompted with the snapshot menu where we name the snapshot.
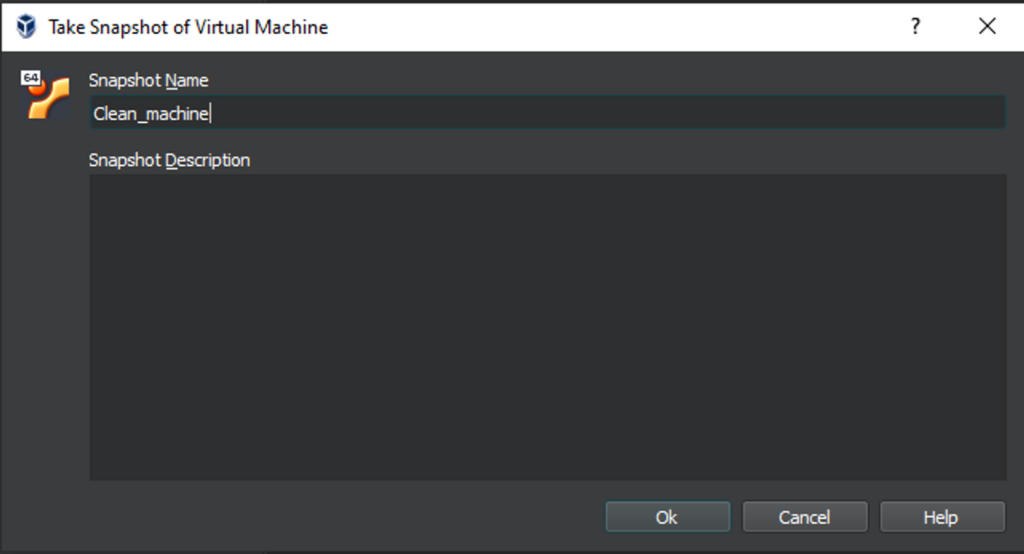
It should take a couple of minutes and we done!
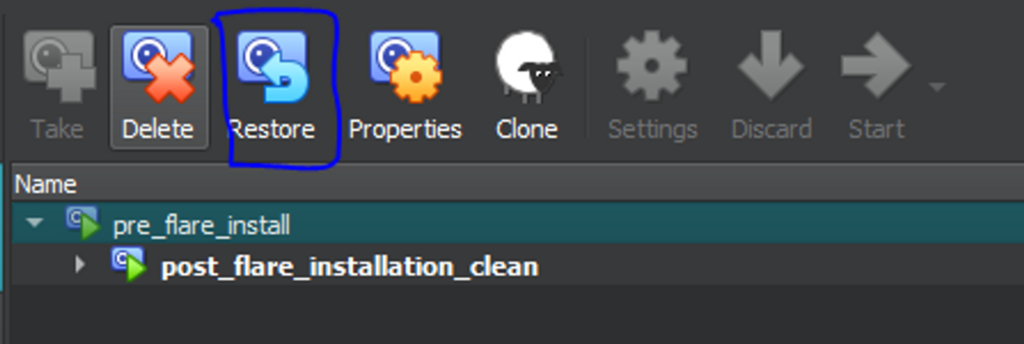
Returning to a snapshot is also easy. We need the machine to be powered off, than we choose the snapshot we want to reload and we click “Restore” on the top center screen.
Have fun and good luck!
